配置中心
一、统一配置管理
当微服务部署的实例越来越多,达到数十、数百时,逐个修改微服务配置就会让人抓狂,而且很容易出错。我们需要一种统一配置管理方案,可以集中管理所有实例的配置。
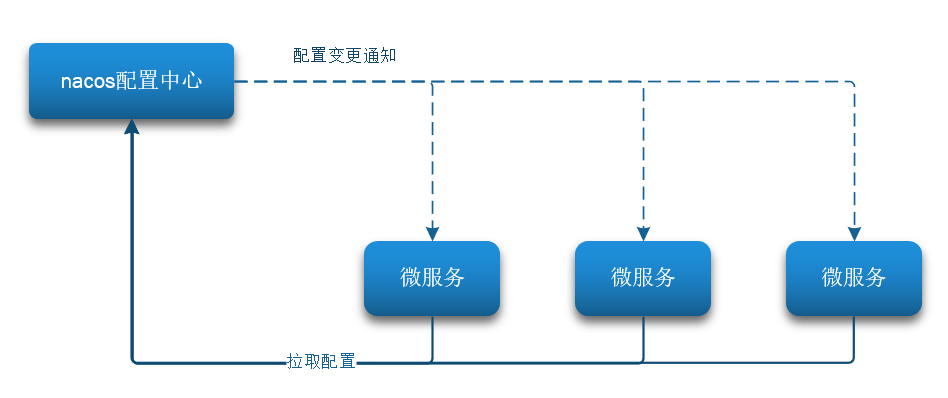
Nacos一方面可以将配置集中管理,另一方可以在配置变更时,及时通知微服务,实现配置的热更新。
1.在nacos中添加配置文件
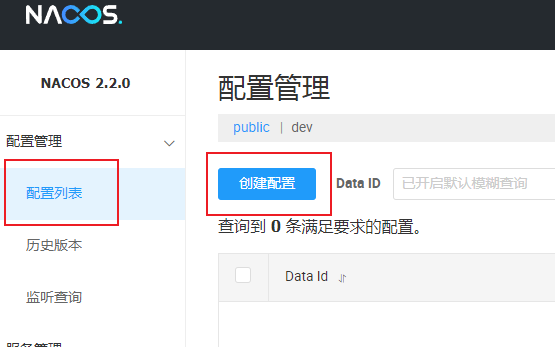
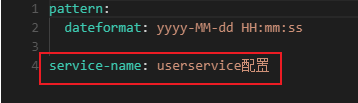
填写配置信息
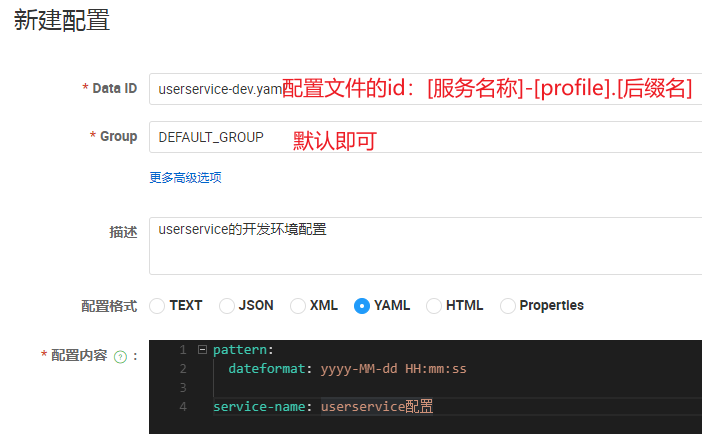
注意:项目的核心配置,需要热更新的配置才有放到nacos管理的必要,基本不会变更的一些配置还是保存在微服务本地比较好
2.从微服务拉取配置
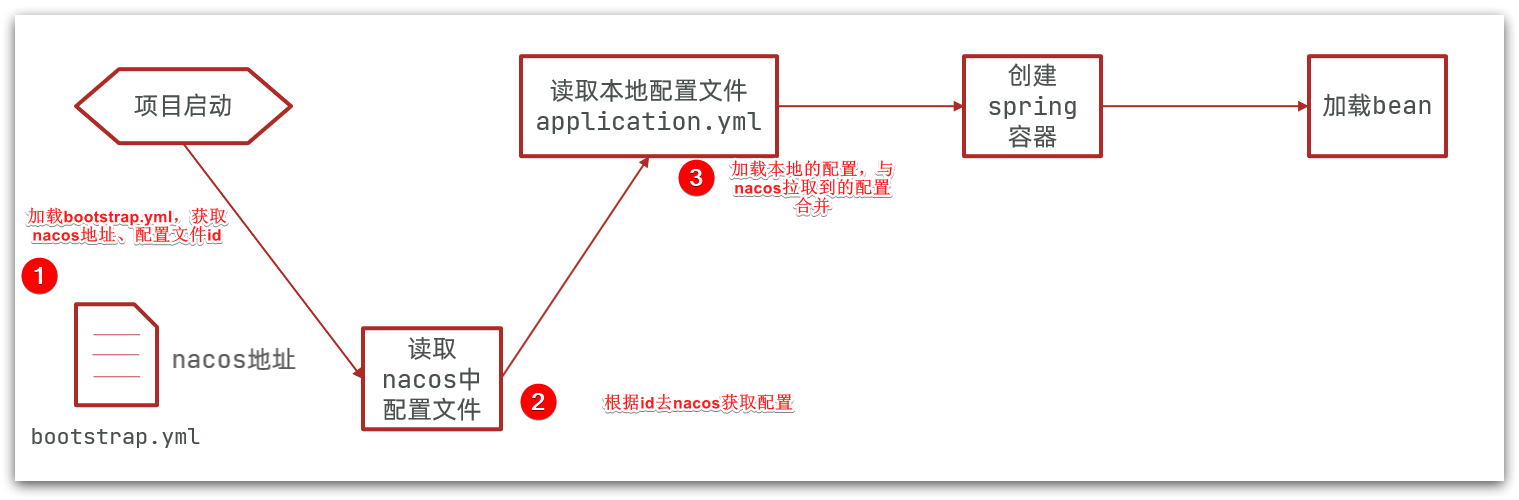
微服务要拉取nacos中管理的配置,并且与本地的application.yml配置合并,才能完成项目启动。
但如果尚未读取application.yml,又如何得知nacos地址呢?
因此spring引入了一种新的配置文件:bootstrap.yaml文件,会在application.yml之前被读取,流程如下:
1)引入nacos-config依赖
首先,在user-service服务中,引入nacos-config的客户端依赖:
<!--nacos配置管理依赖-->
<dependency>
    <groupId>com.alibaba.cloud</groupId>
    <artifactId>spring-cloud-starter-alibaba-nacos-config</artifactId>
</dependency>
2)引入bootstrap依赖
bootstrap在高版本SpringBoot中要手动加入,否则服务无法启动
 <dependency>
    <!--  spring boot 2.3以上的版本-->
    <groupId>org.springframework.cloud</groupId>
    <artifactId>spring-cloud-starter-bootstrap</artifactId>
</dependency>
3)添加bootstrap.yaml
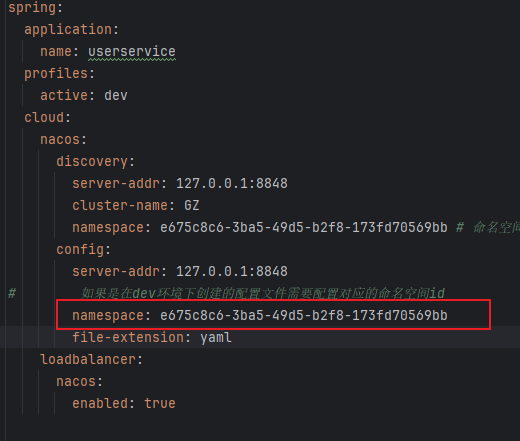
然后,在user-service中添加一个bootstrap.yaml文件,内容如下:
spring:
  application:
    name: userservice
  profiles:
    active: dev
  cloud:
    nacos:
      discovery:
        server-addr: 127.0.0.1:8848
        cluster-name: GZ
        namespace: e675c8c6-3ba5-49d5-b2f8-173fd70569bb # 命名空间
      config:
        server-addr: 127.0.0.1:8848
#        如果是在dev环境下创建的配置文件需要配置对应的命名空间id
#        namespace: e675c8c6-3ba5-49d5-b2f8-173fd70569bb
        file-extension: yaml
    loadbalancer:
      nacos:
        enabled: true
这里会根据spring.cloud.nacos.config.server-addr获取nacos地址,再根据
${spring.application.name}-${spring.profiles.active}.${spring.cloud.nacos.config.file-extension}作为文件id,来读取配置。
3.读取nacos配置
@RestController
@RequestMapping("/user")
public class UserController {
@Value("${service-name}")
private String name;
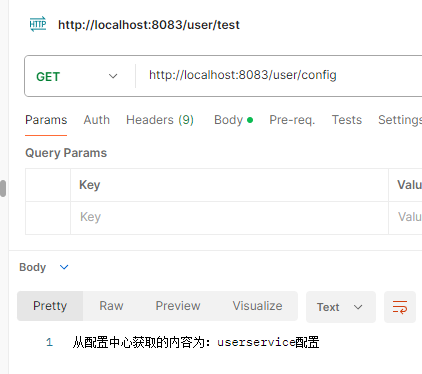
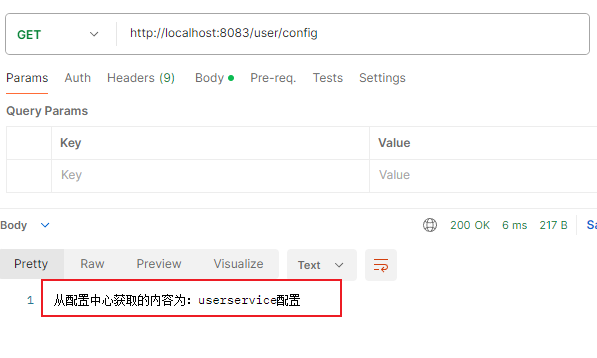
@GetMapping("/config")
public String test2() {
return "从配置中心获取的内容为:"+name;
}
}
二、Data ID命名格式
前面我们在 nacos 控制台新建一个 DataID 为 userservice-dev.yaml 的数据集,那么这个 Data ID 是什么呢?Data ID 是配置集的唯一标识,一个应用可以包含多个配置集,每个配置集都需要被一个有意义的名称标识。那么 Data ID 怎么取值呢?格式通俗一点就是 “前缀-环境-扩展名”,如下所示:
${spring.cloud.nacos.config.prefix}-${spring.profiles.active}.${spring.cloud.nacos.config.file-extension}
① prefix:前缀,默认是 spring.application.name的值,也可以通过配置项spring.cloud.nacos.config.prefix 来配置。
# 若不指定,默认采用应用名的方案
spring.application.name=userservice

# 手动指定配置的dataID前缀标识
# spring.cloud.nacos.config.prefix=userservice
② active:配置运行环境,即为当前环境对应的 profile。
注意:当 spring.profiles.active 为空时,对应的连接符 ”-“ 也将不存在,data Id 的拼接格式变成 ${prefix}.${file-extension}
# dev表示开发环境
spring.profiles.active=dev
③ file-exetension:配置文件的类型,默认是 properties,也可以通过配置项 spring.cloud.nacos.config.file-extension 来配置,目前支持的类型有 TEXT、JSON、XML、YAML、HTML、Properties
# 指定配置文件类型为yaml文件
spring.cloud.nacos.config.file-extension=yaml
④ 最终配置:
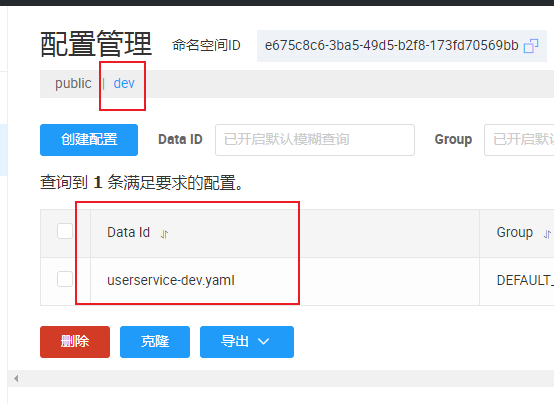
经过前面三个步骤,我们最终在nacos配置中心的控制台新增配置文件就是:userservice-dev.yaml
注意:配置了namespace的,对应的配置中心,也要配置namespace。如:在dev下配置的配置中心,配置文件中要加上namespace
三、配置热更新
1.方式一
在@Value注入的变量所在类上添加注解@RefreshScope:
@RestController
@RequestMapping("/user")
@RefreshScope
public class UserController {

    @Value("${service-name}")
    private String name;

    @GetMapping("/config")
    public String test2() {
        return "从配置中心获取的内容为:"+name;
    }
}
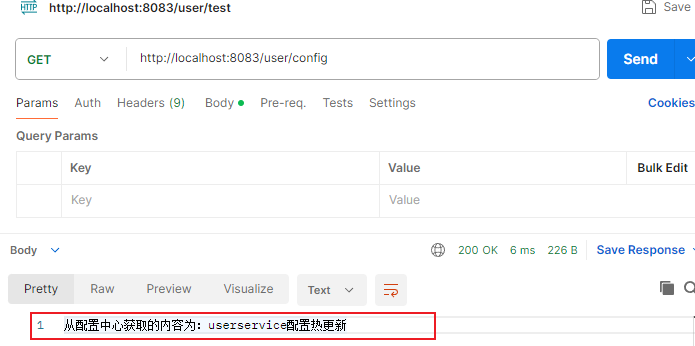
配置中心修改前:
配置中心修改后:
在不重启服务下重新发送请求:
2.方式二
使用@ConfigurationProperties注解代替@Value注解
添加一个类,读取service-name属性:
@Data
@Component
@ConfigurationProperties
public class ConfigProperties {
    private String serviceName;
}
在Controller中使用这个类代替@Value:
@RestController
@RequestMapping("/user")
public class UserController {
    //@Value("${service-name}")
    //private String name;

    @Autowired
    private ConfigProperties configProperties;

    @GetMapping("/config")
    public String test2() {
        return "从配置中心获取的内容为:"+configProperties.getServiceName();
    }
}
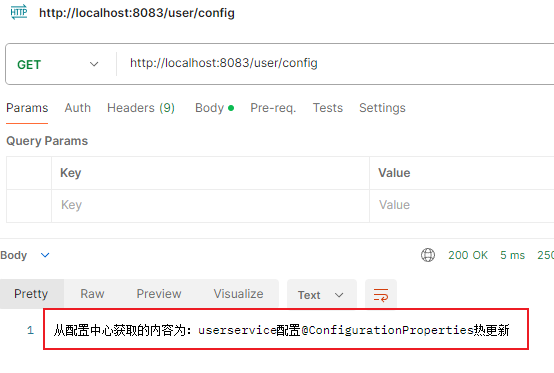
配置中心修改前:
配置中心修改后:

在不重启服务下重新发送请求:
四、配置共享
微服务启动时,会去nacos读取多个配置文件,例如:
[spring.application.name]-[spring.profiles.active].yaml,例如:userservice-dev.yaml[spring.application.name].yaml,例如:userservice.yaml
而[spring.application.name].yaml不包含环境,因此可以被多个环境共享。
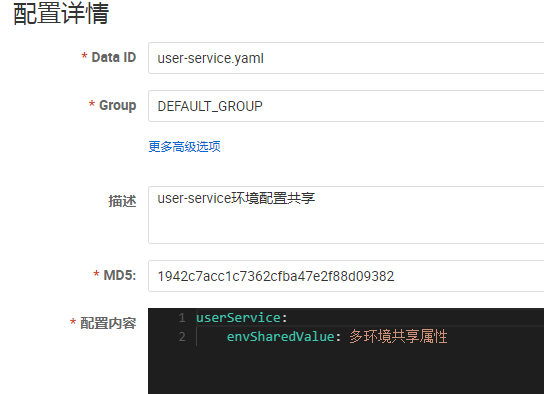
1.添加一个环境共享配置
我们在nacos中添加一个user-service.yaml文件:
2.在user-service中读取共享配置
@RestController
@RequestMapping("/user")
@RefreshScope
public class UserController {
@Value("${userService.envSharedValue}")
private String envSharedValue;
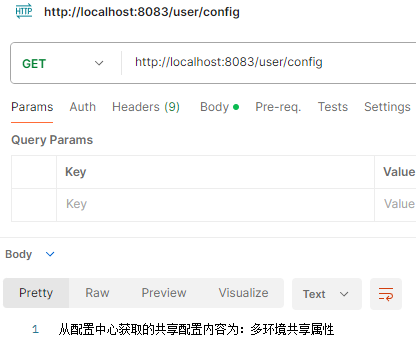
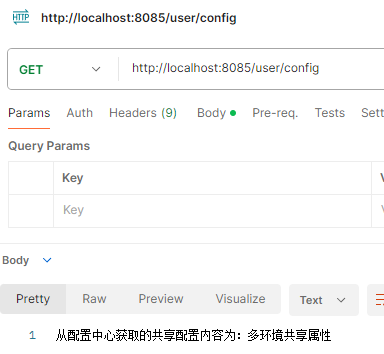
@GetMapping("/config")
public String test2() {
return "从配置中心获取的共享配置内容为:" + envSharedValue;
}
}
3.运行两个UserApplication,使用不同的profile
bootstrap.yml的配置为:
spring:
  application:
    name: user-service
  cloud:
    nacos:
      discovery:
        server-addr: 127.0.0.1:8848
        cluster-name: GZ
      config:
        server-addr: 127.0.0.1:8848
        file-extension: yaml
    loadbalancer:
      nacos:
        enabled: true
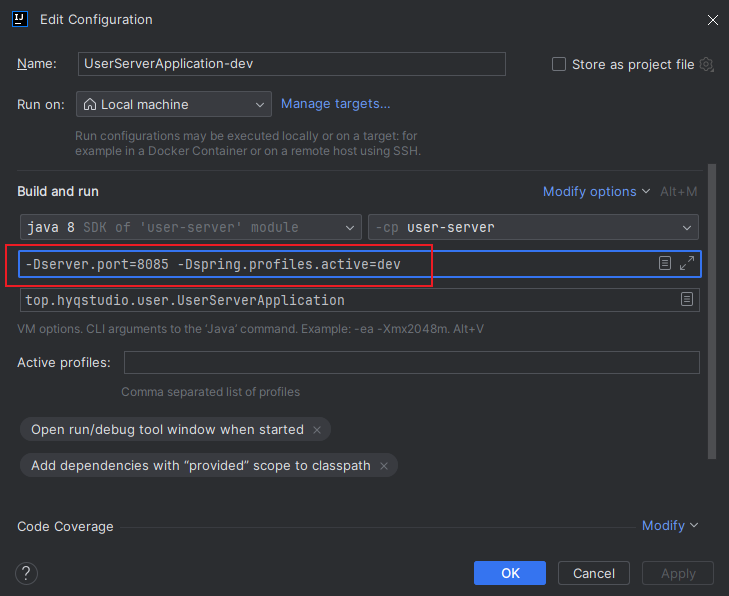
新增一个UserServerApplication-dev启动项,改变其profile值:
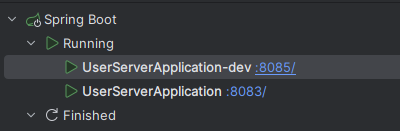
4.启动UserServerApplication和UserServerApplication-dev
其中UserServerApplication-dev的profile为dev
5.测试
默认环境:
dev环境:
五、配置共享的优先级
当nacos、服务本地同时出现相同属性时,优先级有高低之分:
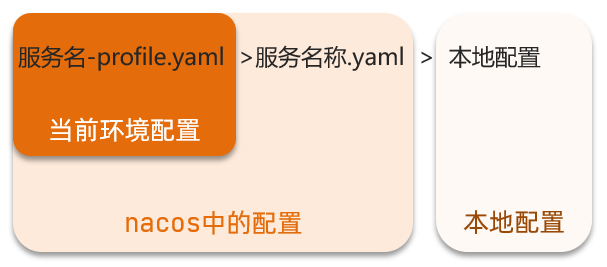
nacos可以配置共享配置和扩展配置
shared-configs(共享配置) < extension-configs(扩展配置) < 基础配置 后面的会覆盖前面的相同属性
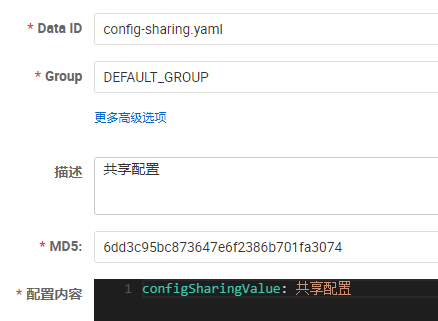
1.新建config-sharing.yaml共享配置
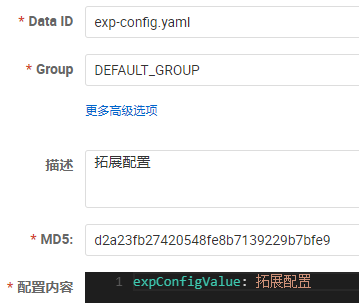
2.新建 exp-config.yaml共享配置
3.修改配置文件
spring:
  application:
    name: user-service
  cloud:
    nacos:
      discovery:
        server-addr: 127.0.0.1:8848
        cluster-name: GZ
      config:
        server-addr: 127.0.0.1:8848
        file-extension: yaml
        shared-configs: # 配置多个配置文件
          - data-id: config-sharing.yaml
            group: DEFAULT_GROUP
            refresh: true
            # namespace: e675c8c6-3ba5-49d5-b2f8-173fd70569bb
        extension-configs: # 配置多个配置文件
          - data-id: exp-config.yaml
            group: DEFAULT_GROUP
            refresh: true
            # namespace: e675c8c6-3ba5-49d5-b2f8-173fd70569bb
    loadbalancer:
      nacos:
        enabled: true
4.测试
@RestController
@RequestMapping("/user")
@RefreshScope
public class UserController {
@Value("${configSharingValue}")
private String configSharingValue;
@Value("${expConfigValue}")
private String expConfigValue;
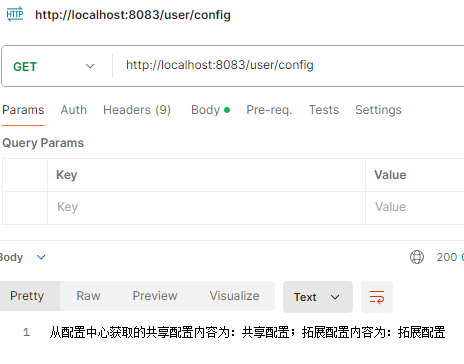
@GetMapping("/config")
public String test2() {
return "从配置中心获取的共享配置内容为:" + configSharingValue + ";拓展配置内容为:" + expConfigValue;
}
}